

CaseWare Working Papers 2019 - Infrastructure Requirements
- Waldo Nell
- Tips and Tricks
- minute(s)Back in 2015, we gave you 3 tips for how to ensure maximum performance from CaseWare Working Papers. With the recent release of Working Papers 2019, we revisit the topic and update our recommendations. Operating System Working Papers runs on the Microsoft Windows operating system. Windows 8.1, and 10 can both be used. Users with Apple macOS or GNU/Linux cannot run Working Papers natively; you will need to run a Virtual Machine system with one of the supported versions of Microsoft Windows installed in it. Hardware At the date of writing, CaseWare International lists these as the minimum technical requirements of the program: 1 GHz 64-bit (x64) processor; 2 GHz recommended for improved performance Minimum 2 GB of RAM; 8 GB recommended for improved performance Program requires 1 GB free hard drive space. A monitor with 1024 x 768 resolution or higher. Internet access is required during the installation of Working Papers. Additional Components Microsoft Internet Explorer 11.0 or higher, as per the Internet Explorer life cycle. Adobe Acrobat Reader version 10.0 or higher. Microsoft Office 2010 or later, or Microsoft Office 365 (Desktop version, Cloud is not supported) Security and permissions Installation requires local administrative rights to the workstation. Use of Working Papers requires read/write access to the program folder and any folders containing client files. You want maximum performance so these minimum specifications should be taken with a grain of salt as they may provide poor performance in some circumstances (large files, many users, etc.). Key Factors in Better Working Papers Performance The following are key considerations for performance of Working Papers: 1) Location of the Data File Many people work with their CaseWare Working Papers file located on a remote, networked file system. This has many advantages, most importantly the ability to backup and protect the files. However, accessing networked storage is often much, much slower than the hard drive located on your computer. For users working on their files located on a remote file system, the number one thing you can do to improve performance is to move the file on to the computer that is running Working Papers. This can be accomplished either by: Using CaseWare SmartSync. Using a Thin Client solution. Using CaseWare's Sign-Out feature. 2) Processor CaseWare Working Papers is not written to take advantage of multiple cores in your computer's CPU. Frequently, modern processors are designed with many lower-speed cores, and Working Papers does not perform well on these chips. For optimum Working Papers performance, focus on maximizing single-core speed. 3) RAM As a 64-bit application CaseWare Working Papers is able to make use of a large amount of RAM. For this reason, we recommend at least 8 GB of memory. Plan for the future. Considering the low cost of RAM, follow the "More is Better" rule. Hardware specifications for IT If you were asked to choose all new hardware and were just thinking about maximizing CaseWare speed, we would recommend the following. Desktop Configuration: To maximize the performance of large / complex Working Papers files running on the desktop: 64-bit version of Windows 8.1 or Windows 10 Get a current generation i5, i7 or i9 processor with a base clock speed of 3.2 GHz or higher Order 16GB or more of RAM Ask for a SSD (solid-state drive) if the Working Papers data file is going to be on the local computer Thin Client Configuration: If you will be using a thin client approach to providing large / complex Working Papers files to end users, recommendations become a little more complicated. Below are our recommendations for configuration of the Thin-Client server, assuming 20 concurrent CaseWare users: Opt for Windows 2012 R2 Standard or better. Get a Xeon E5-xxxx v4 or newer processor with at least 8 cores, no slower than 3 GHz in a dual processor setup. Order 64GB or more RAM. Ask for an enterprise-grade SSD (solid-state drive) in a RAID array Locate all Working Papers data files on this server directly. Some assumptions about these Thin Client recommendations: As user count increases, systems resources must also increase. No virtualization is anticipated in the above specification. If virtualization is to occur, more RAM may be required. Network interface must be at least Gigabit. © 2025 FH Black Inc. All rights reserved. Content may not be reproduced, excerpted, distributed, or transmitted without prior written consent.
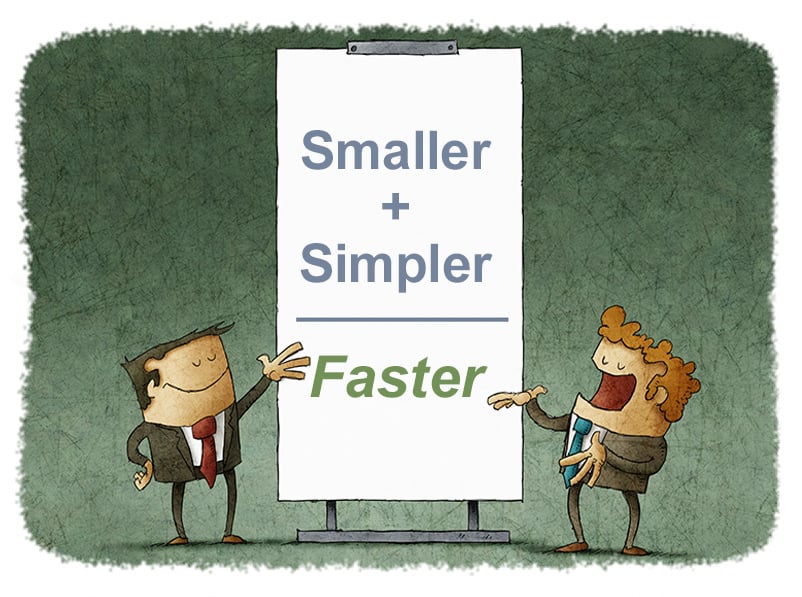
Maximizing CaseWare Working Papers 2019 performance requires both the right hardware and the right configuration.
READ MORE

How to Use CaseWare's Document Manager to Diagnose Problems
- James Goligher
- Tips and Tricks
- minute(s)CaseWare Working Papers has thousands of options, features, and functions. So, you’ll be forgiven if you overlook some of the program's capabilities. In our Tips & Tricks blog series we highlight quick changes you can make, or steps you can follow, to save time and optimize your use of Working Papers. Getting the most out of the Document Manager By default, CaseWare’s Document Manager only displays 2 of the available 20 columns. You can show these columns in any combination and sort their order, allowing you to customize your view to complete tasks more efficiently. How to modify the Document Manager To set which columns are visible (Active) and in what order, access the "Reorder Columns" option on the "View" ribbon. Move columns from "Hidden Columns" to "Active Columns" to make them visible. Highlight an active column (like "Roll Forward as Placeholder" is in the screenshot below) and use the up and down arrows to the left to change the ordering of the columns. When to modify the Document Manager Often knowing how to use a feature isn't enough. Sometimes getting some examples of when to use it is even more valuable. Here are a few examples of when you might want to customize columns in the document manager to find problems in your file: You want to find documents that have not been signed-off: Make the "Completed by" & "Reviewed by" columns active. Note - columns can be renamed by the user, so these columns might have different names in your file. You want to find any documents with outstanding issues: Make the "All Outstanding Issues" & "Uncleared Issues" columns active. You need to see if any documents have been incorrectly configured for Roll Forward, Clean Up, or Lock Down: Make the "Roll Forward", "Clean Up" and "Lock Down" columns active. You want to ensure that all PDFs are set to use CaseWare's internal image viewer so you can annotate them: Make the "Viewer" column active. You need to quickly review and change the tags assigned to your documents: Make the "Tags" column active New CaseWare enhancements are always being released. Keep informed, subscribe to our blog. © 2025 FH Black Inc. All rights reserved. Content may not be reproduced, excerpted, distributed, or transmitted without prior written consent.
CaseWare Working Papers' allows the addition of Document Manager columns which will save time & increase the effectiveness of your year/quarter/month end.
READ MORE

How to use CaseWare's Filters to save time
- James Goligher
- Tips and Tricks
- minute(s)In our Tips & Tricks blog series we highlight many efficiency-boosting techniques. Here is another one designed to save time. CaseWare Working Papers' document manager is a powerful tool that we have written about. The ability to drag & drop, sort, create placeholders and view sign-off/issues related to a given document, are just a few commonly used features that simplify and improve year/quarter/month end file preparation. Adding 100+ supporting documents is great, but it can make it difficult to find particular documents later. Fortunately, CaseWare gives us Filters to make this simple too! Filters allow you to hide those documents that are unnecessary at a given time. This ensures you see the information you need, exactly when you need it, without having to search through dozens of folders and hundreds of documents. Some examples of great use cases for Filters: To Be Reviewed List: Hide documents that are not ready to be reviewed yet (not signed off in all roles) Special Topic List: Only show documents related to the FIR / LGDE (filter on Tags) Problem Areas: Only show problem documents (have issues assigned that are not cleared) Task List: Only show documents for a specific user (filter on Tags) Outstanding Documents List: Only show supporting documents that have not been uploaded yet (filter on placeholders) Watch the video below to learn how to use and modify Filters in CaseWare’s document manager. © 2025 FH Black Inc. All rights reserved. Content may not be reproduced, excerpted, distributed, or transmitted without prior written consent.
CaseWare Working Papers' allows the addition of extensive supporting documents. This Tips & Tricks post teaches creating & using Filters to increase efficiency.
READ MORE

The quick & easy way to import into CaseWare
- James Goligher
- Tips and Tricks
- minute(s)To take full advantage of CaseWare's power to automate your reports, you must first import your data. There are numerous accounting software packages that CaseWare imports from directly. Even if your package is supported, however, we do not typically recommend you use the "Accounting Software" method. Instead, we advise using the "Excel File" import feature. Why? There are two key benefits: Consistency. Perhaps you work in an accounting firm and need to import from dozens of different accounting packages. Rather than learn different processes for each, you can learn just one - Excel. Data Integrity. Working with Excel you can review data and ensure it balances before you import. Many folks identify a drawback, however - speed. With Excel, users must specify numerous options before import, which can be both confusing and time-consuming. If that's your experience, this blog is about to save you that most valuable of assets, time. Most users don’t know about the ‘Record Layout File’ option. Simply put, it’s a way for you to automatically populate all options in the Excel Import Wizard. Making the import a 4-second process. No more identifying rows to be excluded, no more labeling columns, no more selecting advanced options every time you import. Instead define these criteria a single time, save a record layout file and apply it subsequent imports. NOTE - to take advantage of this process, you will want to have the Excel file in the same format every time you import it. So, it is best to find the right report in the accounting software, and export that same one every time. For more information on importing from Excel to CaseWare Working Papers, including a demonstration of how to get from import to draft Financial Statements in under 3-minutes, see our CaseWare Feature Spotlight: Importing Data blog. © 2025 FH Black Inc. All rights reserved. Content may not be reproduced, excerpted, distributed, or transmitted without prior written consent.
There are many ways to import data into CaseWare. But, only one applies to all users, takes under 5 seconds, and can be reliably executed time after time.
READ MORE
How to improve CaseWare performance by 20%
- Darryl Parker
- Tips and Tricks
- minute(s)During our introductory CaseWare training sessions, we focus on the fundamentals. To move users beyond these basics and ensure an even faster year end, we regularly provide CaseWare tips & tricks in this blog series. Our advice in this article is simple: eliminate unnecessary groupings from your file. It nearly always means better performance and less confusion! Why Purge? Why should you care about cleaning up (purging) your mapping and grouping codes? You want as comprehensive a grouping structure as possible - initially.That way you know you have an appropriate location for every G/L account. Once you have grouped all your accounts though, a typical file will have a large number of groupings that are not necessary. Those unnecessary groups slow down the file. They also slow you down, as you have to scan through long columns full of zeros and determine whether they are noteworthy. $0.00 of "Fishing Revenue" might be expected for your statements, but what about $0.00 of Account Receivable? That's why purging the map numbers or group numbers in any file can be a significant improvement. It moves the file from a generic setup to one tailored exactly for this year-end. In large, complex files we see dramatic results: Opening large financial statements: up to 10% faster. Opening group assignment window: up to 10% faster Opening grouped lead sheets and trial balances: up to 60% faster. In one of our large IFRS client files, cleaning up the groupings resulted in a more than 20% improvement in speed across a simple set of tasks (opening the file, reviewing the consolidation and mapping, and looking at automatic documents and the financial statements). Note - in a very simple file, the speed improvements may not be noticeable but the benefits of a file that is easier to navigate remain. We’ve posted recently about the standard Mapping Purge feature in CaseWare Working Papers. Read that article for an understanding of the built-in features, and then get ready for a more advanced map purge that addresses the limitations of the standard one. The Advanced Purge tool Perhaps you tried the regular map purge in your own Working Papers files. Or maybe you read about the problems that the built-in mapping purge has (can only work on mapping, cannot check account assignment, required knowledge of dBase filters) and thought it was not a good fit for your organization. We want you to be able to quickly and easily clean up the unneeded grouping numbers in your file so you have an even faster year-end. So, we built a tool to allow you to do just that. And we are providing it to CaseWare users for free. The Advanced Purge Tool will: Allow you to choose any of the mapping or 10 grouping structures to clean up. Never delete a map/group number with any adjustments related to it. Never remove a map/group number with any account allocated to it or any of its child map/group numbers. Check three years of historical balance data to determine if prior year adjustments should preclude deletion of a map/group number. Allow you to choose whether calculated map numbers should always be saved, or should apply the balance-checking logic to them. Define a “root” or “base” map number length that will not be deleted under any circumstance. BEFORE YOU START - A Word of Warning!!! The Advanced Purge tool will delete group numbers out of your Working Papers file, and there is no undo button. You must take a backup before running a purge. Even better, take a disposable copy of your file and thoroughly test a purge and verify its effects before running it in your live file. And even then, you should take a backup of that live file in advance of running your thoroughly tested purge! To use the tool: Download the tool. It is a compressed (Zip) file so you will need to extract it after downloading. The tool is a single CaseView document. After extracting, drag and drop this document onto the Document Manager of the file to be improved. Launch the CaseView document. Confirm you understand the risks of purging groups. Choose the grouping mechanism from which you wish to eliminate zero balance. Choose what balance type to examine for balances and if Other Basis entries should be considered. Specify if you want to keep calculated group numbers. Specify if you would like to keep base group numbers. If selected, you must also note how many digits are represented in your definition of a base group number. Once completed, select Perform Purge. When finished (it may take awhile), you will get a confirmation of how many unused groups have been eliminated. You can get a copy of the tool to see how it will simplify and streamline your own data files. All you have to do is click the image below! Consider our more advanced CaseWare training if you want your CaseWare Black Belt! © 2025 FH Black Inc. All rights reserved. Content may not be reproduced, excerpted, distributed, or transmitted without prior written consent.
Our tip in this article is simple: purge unnecessary groupings from your file to improve CaseWare Working Papers performance by up to 20%
READ MORE

CaseWare Tips and Tricks: 5 Steps to Solving Out of Balance Issues
- Jamie Black
- Tips and Tricks
- minute(s)Everyone responsible for financial reporting wants as fast and as simple a quarter-end or year-end as possible. Your organization uses CaseWare Working Papers specifically to achieve this goal. It has many excellent tools to prevent mistakes and reduce the time invested by your finance team. It is THE tool that makes finance look good and prevents them from having to spend their evenings and weekends in the office. An obvious prerequisite for this faster financial reporting is starting off with good data. No system, no matter how amazing, is going to help if we start off with a GL that doesn't balance. As a result, another of our CaseWare Tips and Tricks is to immediately confirm the GL in CaseWare Working Papers foots to zero when you have completed importing your account balances. To do this, click on the Trial Balance button on the Navigation toolbar. Now look at the very last line (note it may take a moment to calculate if you have a very large GL). It should appear like this: Depending on your budgeting practices, it may be the case that your budget values may not foot to zero so in this case, a non-zero balance in the budget column could be acceptable. But what if one or more of the "actual" columns do not foot to zero? Step 1 - Repair File On occasion - typically due to either a crash of a work station or a network interruption - your Working Paper's file may need a recalculation. This is essentially what the Repair File feature does. On the Tools tab of the Ribbon, select Repair File. Click all the boxes and select OK. Working Papers will prompt you to make a back up of your data file. We strongly recommend you to say "YES" to this prompt. The repair file may take a few moments, and you will see a number of progress bars appear on your screen. Once completed, go back and review the totals at the bottom of the Working Trial Balance and see if they are now set to zero. If they are now all set to zero, you are able to carry on with the month / quarter / year end. If not, continue on to step 2. Step 2 - Determine What is Out of Balance Review the total row of the Working Trial Balance and note exactly which columns do not equal $0.00. Budget Column If it is the budget column, as we mentioned above, you may not have a problem. Adjustments Column If the Adjustments column does not foot to zero, it means one or more of your adjusting entries are not in balance. You can quickly find these entries by choosing Diagnostics from the Tools tab of the ribbon. Set the Report type to "Out of Balance Entries," choose the 1st option and click the OK button. Any entries that are out of balance will be listed and you can now review and correct them. Opening Balance Column If the column that is out of balance is the Opening Balance column, there could be a number of causes and further investigation is warranted. One thing to be aware of is that this column is editable. Meaning we can not exclude the possibility that someone modified one or more accounts intentionally or otherwise. With this one point in mind, we encourage our clients to see if there are other discernible causes. Step 3 - Sum balance columns in Excel Most of our clients import their end-of-period balances into the Opening Balance column of Working Papers from a Microsoft Excel file, and the remainder of this guide is written based on that common scenario. If you're out of balance after Working Papers generated an opening balance as part of the year-end close process, or if you are importing the Opening Balance directly from an accounting package, contact us to help in troubleshooting your file. When you have populated the Opening Balance column via an import from Excel, it makes sense to check the Excel file to confirm that the balances being imported were good to begin with (i.e. sum to zero). If the Excel file is also out of balance, there could be a number of causes. To start, determine if there is a setting in your ERP that excludes some accounts from the export to Excel. Even scarier, perhaps the GL in your ERP system does not balance to zero.You will want to check on that too. If the balance columns in Excel do balance to zero, move on to Step 4. Step 4 - Look for duplicate accounts in Excel By default if CaseWare encounters two accounts with the same entity and account number it behaves in a very specific way. To understand, let's consider the following example: In the above example, on import, CaseWare would update the Opening Balance column of account 101 Petty Cash to $200. Then when it comes across the second instance of account 101 (with the same entity) on the fourth row, it will update the balance to $1,000. The result is your Working Trial Balance will be out out of balance by $200. Now you must determine why you are getting the same account multiple times in your Excel file. This will likely require some investigation back in your ERP system. In the event that you determine that it is appropriate to have the same account / entity combination presented multiple times with different values, you will need to modify the import layout file to accumulate balances. On the last page of the Excel File Import wizard titled "Advanced Specifications," you need to enable the checkbox for "Accumulate Balances." With this setting enabled, in the above scenario CaseWare will add together the $1,000 balance and the $200, keeping the Working Trial Balance footing to zero. If you could not find any duplicate accounts in Excel, we are now left with three possible causes: Manual over-ride. Intentionally or unintentionally a balance was changed in the Opening Balance column in CaseWare some time after import. Changed Entity - The entity assigned to an account was changed in CaseWare after import.The reason this is a problem may not be immediately apparent however. Consider the following example: On import account, account 107 was associated with Entity GG. Some time after to import, the entity was changed. You may have done this to move a balance from one of your consolidation entities to another. Imagine you opened the "Assign Entities" interface from the Account Ribbon and dragged 101 from the "GG" entity to the "PS" entity. On re-import, if the Excel file still has the account being assigned to GG, CaseWare will not update the manually changed PS-107. It will instead ADD a "new" account GG-107, thereby throwing the GL out of balance. Omitted Accounts - One of the accounts that has a balance in CaseWare is no longed included in Excel file you are importing. This is a problem because by default, CaseWare only updates account values that are in the Excel file. Thus, if an account is not in the Excel file, the old balance will be retained, throwing your GL out of balance. The solution to all three of these final causes is the same, a re-import done properly. Step 5 - Delete Opening Balance column and Re-Import If you have gotten this far, the final step is to re-import your Excel file. But first, we will eliminate existing balances (Note - now is a great time to take a backup of your CaseWare file!). In the Working Trial Balance, right-click on the Opening Balance column header. Choose "Select Column". Then press the Delete key on your keyboard. This will set every account balance to $0. Now you are ready to re-do your import. 99.9% of the time these steps will guarantee you a balanced GL after the import completes. © 2025 FH Black Inc. All rights reserved. Content may not be reproduced, excerpted, distributed, or transmitted without prior written consent.
CaseWare Tips and Tricks - solve out of balance issues easily to ensure a fast, trouble-free year end
READ MORE
Tips & Tricks: Selecting a Measurement System
- Darryl Parker
- Tips and Tricks
- minute(s)In daily life most Canadians regularly switch between Imperial and Metric measurement systems. While we technically use Metric in Canada, many of us only know our height in feet / inches or our weight in lbs but gauge the speed we travel to work in kilometers. As a result, when it comes how we setup and use our computer applications, it is not a given that everyone uses one system or the other. I suspect that for our American cousins, the selection of Imperial is a forgone conclusion. Imperial vs. Metric in CaseView To ensure you maximize the benefits you receive from CaseWare, some seemingly small details can be important. You may not remember it now, but a long time ago you made a choice – whether your CaseView was configured Imperial (inches), or Metric (centimeters). The very first time you open a CaseView document in a new installation of the program, it will prompt you to make your choice: The implications of this decision are lost to many who make it. Although rare, it can be a source of problems in your reports. Often, there is a “right” and a “wrong” answer, but knowing which one it is can take some thought and care since it’s different for each user of the product. Consistency is Key Behind the scenes, CaseView stores all sizes in a special internal format which is different than both inches and centimeters. So no matter what system you choose, there are always conversions going on in the background. And whenever there are conversions occurring in the background, there is the possibility for rounding and truncating of the values. The key to knowing which measurement system is best for you is to consider the history of the CaseView documents you use. What measurement system were they created in? Which setting on your computer will reduce the number of conversions between measurement systems? That's the best one for you and your team. And remember the other people on your team - those rounding and truncating problems can happen inside of your own office if User A is set to use Imperial and User B is set to use Metric. For those of you using documents created or customized by third parties - you may be able to learn the measurement system used in developing directly from them. As a rule of thumb, if you are using CaseView documents from CaseWare International itself, or from F.H. Black & Company Incorporated, the documents will have been originally developed and customized in Imperial Inches, and that is the best setting for your computer. How Bad Could It Be? In truth, you could use the “wrong” setting for a long time before it surfaces as a problem. Almost never is a rounding difference in the thousandths of a centimeter a significant amount of space for your document. Does anyone care whether that cell is 2.500 cm wide or 2.501 cm wide? There is one thing that does care about precise sizes – your printer. The biggest problem I have seen is where tables are configured to exactly and perfectly fill up the available space. Imagine a US Letter piece of paper with exactly 8.5” of width, and with a combined margin space of 1.4”. That leaves 7.1” of printing space for the contents. If the designer builds that document with a table exactly 7.1” wide, the trap is set. When a user configured for centimeters prints that document, rounding and truncating may cause it to appear too wide for the available space. The worst part is that the preference for measurement system is user-specific. So if User A (who has CaseView set to use Imperial) prints the report, everything might look fine. But when User B (configured to use Metric) prints it, the table is too wide to fit on the page and prints incorrectly. The result is an apparently intermittent, recurring issue that leaves end users never knowing what they are going to get. How to Change your Measurement System Changing your measurement system for all of your documents is a simple thing to do - it's just a few mouse clicks. The caveat is that to do it, you must have access to Design Mode in CaseView. For some of the readers of this article, that is not as easy as it sounds. For example, if you use the Financials Template from CaseWare International, you are not allowed to access design mode in any of those documents. With that in mind - the following procedure will work for any user and assumes that you are using Working Papers 2015: Open any CaseWare Working Papers file. For safety, I recommend the Samp01 file you received in your C:\Program Files (x86)\CaseWare\Data folder when you installed the program rather than a real data file, but any Working Papers file will do. Click at the top of your document manager. On the Home Ribbon, in the Insert Panel, click on the "CaseView" item. In the "New CaseView Document" dialog box, fill in a temporary Number, Name, and Identifier, and click the OK Button. Find your new TEMP document on your document manager, and open it. The document will open in CaseView. In CaseView, on the Tools Ribbon, in the Utilities panel, click on the Options item. In the Application Options dialog box, click on the Measurements tab. In the Measurement Units drop-down selection, select the appropriate unit: Inches for Imperial or Centimeters for Metric. Click the OK button. Click the blue "File" menu item to open the Backstage view of CaseView. Click the "Exit" sidebar menu item at the bottom left. Once back on the Document Manager, click on your TEMP document and press the Delete key on your keyboard. In the Delete Document dialog box, click on "Permanently Delete Document". You're done! Every CaseView document you open on your computer from now on will use the measurement system you selected in Step 7 above. Remember - this measurement system preference is per installation of the software. Every member of the team should ensure that they are on the same measurement system to avoid the kind of inconsistencies in printed reports we discussed above. © 2025 FH Black Inc. All rights reserved. Content may not be reproduced, excerpted, distributed, or transmitted without prior written consent.
Tips & Tricks; Learn how to eliminate intermittent errors and set the measurement system in CaseView and which one is right for you.
READ MORE

Want a faster, more accurate year-end? Use Working Papers Checklists
- Jamie Black
- Tips and Tricks
- minute(s)CaseWare is a flexible reporting and assurance software tool that allows your team to be completely paperless. It's used by financial professionals throughout the world to automate annual, quarterly and monthly reporting. You know that. That's why you bought it. This article is another in our Tips & Tricks series to ensure you to take full advantage of Working Paper's power to get an even faster year, quarter and month end. Why Checklists? We all use checklists in day-to-day life. If I am sent to the grocery store, I need a list. How else could I be expected to remember all the stuff I was sent for? Without a list to refer to as I shop, it's guaranteed to become 2 or 3 trips, wasted time and frustration. So if I need a checklist for something a simple as getting milk & cheese, why would I not use checklists for something as complex as a year-end, quarter-end, or month-end? Especially when getting everything done properly the first time would save everyone (our team AND the auditor) so much time. Alright, we convinced you. Now, if you are going to use checklists they should be in your CaseWare file (everything related to your year/quarter/month end should be in there). And if you have your checklist in Word or Excel or some other program you should consider converting them to a CaseWare Checklist. Two types of Checklists in Working Papers There are two different ways to use checklists in Working Papers. One is obvious and the other less so, but neither are used as extensively as they should be. Here’s how you add checklists to your documents in Working Papers 2015. 1. Program / Checklist Automatic Document In this example, let us imagine we want to create a list for all the tasks we need to complete related to our cash accounts: Select a leadsheet report from the document manager. We'll use "A - Cash" for this example. Right click on the "Cash" document, select the "New" menu item, and then "Automatic Document". A New Document dialog box will open. By default, our new document has a number of A.1 because CaseWare selected that as the next available number after "A". You can change it here if you like. Modify the name of the document to "Cash Checklist." Under Document Type, select "Program/Checklist." Under Format we will select "Checklist - Format 1". Note - if you choose a different option under Format, it will change what columns appear in your checklist. Click "OK". The "Cash Checklist" document will be created directly under the "Cash" leadsheet report. If you made a mistake, you can rename & renumber the document by right clicking on the document name and selecting "Properties". When you double click on our new document, the blank checklist appears ready for you to copy and paste in all of the procedures. In Format 1, the checklist has a column for the person who has completed the task to sign off (Y/N pick list) and a place for his/her initials. The checklist also has columns for document references, explanation and annotation. You can reorder these columns, by selecting the "View" tab of the Ribbon and then selecting the "Re-order Columns" button under view. Move the columns up or down in the list to change the ordering of the columns. These checklists are stored within the Working Papers file allowing multiple people to work on them.Checklists for different sections can be assigned to different staff members avoiding a duplication of efforts while allowing the supervisor to track everyone's progress. 2. Document Manager as the Master Checklist The Document Manager is a list of all the documents in your audit binder. As you ensure that each document is ready for the auditor, sign it off. This puts a check-mark on the document manager. Presto - the Document Manager is your master checklist! To make this even more powerful: Use the Reorder columns feature to make sure that all of the sign-off roles you use are Active Columns. This means that you will see initials & the date the document was signed off on the document Manager. Review the document properties for all the documents you add to CaseWare as support: If you will need this exact document next year, tick the Roll Forward checkbox. If you don't want this exact document in next year's file but you need next year's version of this document, tick the Roll Forward AND Roll Forward as Placeholder. This will reserve a spot for the document in next year's file and is your reminder to add it before giving the file to the auditor. Remove unnecessary documents to have an accurate list of the things you have to complete/prepare as part of your period end work. Clutter just confuses people and wastes time. Ultimately we want to build a system that produces highly repeatable results in as little time as possible. Using the checklist functions in CaseWare Working Papers might be the little feature that solidifies these results for your team! © 2025 FH Black Inc. All rights reserved. Content may not be reproduced, excerpted, distributed, or transmitted without prior written consent.
Often overlooked, using Checklists in your CaseWare file can have major benefits
READ MORE

CaseWare Working Papers and Windows 10 – To Upgrade or Not?
- Darryl Parker
- Tips and Tricks
- minute(s)Considering Whether to Upgrade I have had several people ask me whether they should upgrade their computers to Windows 10, the latest version of the nearly ubiquitous computer operating system from Microsoft. On my personal computers, I have upgraded and recommend that people consider upgrading for all the great new features available in the new system. However, on work-related computers you should carefully weigh the risks and benefits of performing any operating system upgrade. CaseWare Working Papers is a one of a handful of mission critical applications for me: without a stable, properly functioning installation of CaseWare Working Papers it is very difficult for me to perform my day-to-day work. No matter the benefits of Windows 10, any risk to my use of Working Papers is just not acceptable. CaseWare International is officially supporting Windows 10, so you can be confident that if you have any problems, you will be able to speak with their Technical Support department and have them work to resolve any problem you have. However, you must acknowledge that the risk of a problem occurring is higher when using Working Papers with Windows 10 than with an earlier version of the operating system. The Risk is Real On August 11, 2015 CaseWare International sent out an email to all users warning them of a critical issue preventing SmartSync and the CaseWare Cloud service from working correctly for Windows 10 users. The fix for the problem was released on September 1, 2015 (3 weeks later) in the form of CaseWare 2015.00.142 (Release 3). For more information on this issue, check out CaseWare’s Knowledge Base article. That is an extreme example that is not likely to be repeated, but consider what effect a 3-week interruption in your access to Working Papers and your client files would have on your work. FHB’s Recommendation As of the date of this writing (October, 2015) F.H. Black & Company Incorporated is recommending to our clients to postpone upgrading to Windows 10. In the future and as CaseWare International continues to improve compatibility with the new operating system, the risk differential between Windows 8 and Windows 10 will diminish and we will reconsider our recommendation. One Final Thought If you are one of the estimated 250 million people still running Windows XP on your computer, it is quite important that you upgrade to a more recent version of Windows as quickly as possible. Windows XP is no longer supported by either Microsoft or CaseWare International. That lack of support means that you are exposed to significantly higher risk of security breaches on your computer, and a lack of support when problems occur. Immediately discuss with your IT specialists how to upgrade to Windows 7, or 8, or perhaps even 10 after a consideration of the risks described above. © 2025 FH Black Inc. All rights reserved. Content may not be reproduced, excerpted, distributed, or transmitted without prior written consent.
If you are using CaseWare Working Papers and are considering upgrading to Windows 10 be aware of the considerations. Make sure you know what to expect.
READ MORE

CaseWare Working Papers: 3 Tips for an Even Faster Year End
- Darryl Parker
- Tips and Tricks
- minute(s)Whether you are doing quarterly SEC filings or annual PSAB / GASB financial statements, you want to get your financial reporting tasks done as quickly as possible. Who has time to wait while their computer struggles to keep up? You read about how so many others have automated their financial reporting with CaseWare. You bought CaseWare Working Papers to get these same results. But is your computer preventing you from achieving an even faster year end? The official minimum requirements can be found here. This article will further investigate these requirements, give you 3 tips to improve CaseWare's performance and give you a list to send to IT so they can order you the perfect workstation. Operating System Working Papers runs on the Microsoft Windows operating system. Windows 7, 8, and 10 can all be used. If you are using Windows XP, you should make immediate plans to upgrade. At the time of writing, (October, 2015) Windows 10 is fully supported by CaseWare International, but there have been some issues with compatibility. Users should be cautious about using Windows 10 with mission-critical software which has not had a chance to be fully vetted against the new operating system. Further, if you have the opportunity, selecting the 64-bit version of Windows 7 / 8 will facilitate improved performance as these operating systems can take advantage of larger quantities of RAM. Users with Apple or GNU/Linux cannot run Working Papers natively; you will need to run a Virtual Machine system with one of the supported versions of Microsoft Windows installed in it. Hardware At the date of writing, CaseWare International lists these as the minimum technical requirements of the program: 1 GHz 32-bit (x86) or 64-bit (x64) processor. Minimum 1 GB of RAM for 32-bit Working Papers or 2 GB of Ram for 64-bit Working Papers. 4 GB and 8 GB respectively are recommended for improved performance. Program requires 500 MB free hard drive space. A monitor with 1280 x 1024 resolution or higher. Internet access is required during the installation of Working Papers. Additional Components Microsoft Internet Explorer 11.0 or higher, as per the Internet Explorer life cycle. Adobe Acrobat Reader version 10.0 or higher. Microsoft Office 2007 Service Pack 3, 2010, 2013, 2016, or the desktop version of Microsoft Office 365. Security and permissions Installation requires local administrative rights to the workstation. Use of Working Papers requires read/write access to the program folder and any folders containing client files. However, in FHBINC's experience, these minimum specifications may provide very poor performance if you are working with larger or more complex files (especially those files containing a large number of consolidation entities). Key Factors in Working Papers Performance The following are key considerations for performance of Working Papers: Location of the Data File Many people work with their CaseWare Working Papers file located on a remote, networked file system. This has many advantages, most importantly the ability to backup and protect the files. However, networked storage is often much, much slower than the hard drive located on your computer. TIP #1: For users working on their files located on a remote file system, the number one thing you can do to improve performance is to move the file on to your local computer. This can be accomplished either by: Using CaseWare SmartSync Using a Thin Client solution Using CaseWare's Sign-Out feature. Processor CaseWare Working Papers is not written to take advantage of multiple cores in your computer's CPU. Frequently, modern processors are designed with many lower-speed cores, and Working Papers does not perform well on these chips. TIP # 2: For optimum Working Papers performance, focus on maximizing single-core speed. RAM 32-bit operating system: As the operating system is limited to utilizing 4 GB of RAM, there is no benefit to having more than this amount. Note in the near future, CaseWare will require the use of 64-bit operating systems. 64-bit operating system: 64-bit versions of Windows are able to make use of a much larger amount of RAM. Although Working Papers 2014 (and earlier versions) are 32-bit applications and only able to use 4 GB of RAM, your computer will benefit from the additional memory for all of the other programs you are running. For this reason, we recommend at least 8 GB of memory. CaseWare International has released a 64-bit version of Working Papers. Thus, the application itself will be able to make much greater use of RAM. Tip # 3: Plan for the future. Considering the low cost of RAM, follow the "More is Better" rule. Hardware specifications for IT Desktop: To maximize the performance of large / complex Working Papers files running on the desktop: Opt for the 64-bit version of Windows 8 or Windows 10 Get a 4th/5th Generation i5 or i7 processor with a base clock speed of 3.2 Ghz or higher Order 16GB or more of RAM Ask for a SSD (solid state drive) if the Working Papers data file is going to be on the local computer Thin Client: If you will be using a thin client approach to providing large / complex Working Papers files to end users, recommendations become a little more complicated. For simplicity in our recommendation below we assume potentially 20 concurrent CaseWare users: Opt for Windows 2012 R2 Standard or better. Get a Xeon E5-xxxx v3 or newer processor with at least 8 cores, no slower than 3 Ghz in a dual processor setup. Order 64GB or more RAM. Ask for an enterprise-grade SSD (solid state drive) in a RAID array and the Working Papers data file hosted on this local computer. Some assumptions about these Thin Client recommendations: As user count increases, systems resources must also increase No virtualization is anticipated in the above specification. If virtualization is to occur, more RAM may be required Network interface must be at least Gigabit © 2025 FH Black Inc. All rights reserved. Content may not be reproduced, excerpted, distributed, or transmitted without prior written consent.
To get the most from CaseWare Working Papers, upgrade from the minimum hardware requirements. A faster year end will likely be the result.
READ MORE
